Showing posts with label Mixed Media. Show all posts

Overflowing Blessings Canvas


Hello, and welcome to the Mixed Media Attic! I wanted to share with you all a little canvas that I just finished working on this afternoon.  The verse Psalm 23:5 says "My cup overflows with blessings."  

                                                                                                                                    I had an idea to take that verse and use it on a canvas with some stacked tea cups.  I decided to use some card stock paper from the Illustrated Faith collection "She Blooms".  I used my Silhouette Portrait Die Cutting Electronic cutting machine, to cut out the tea cups. I stacked the tea cups on the canvas before starting, just to make sure there were enough for the height of the canvas. I like to take pictures of the way things are arranged, so when they get moved later I will remember the order that they were in by looking at the picture taken. After making sure there were enough tea cups to stack, I covered the canvas in some printed tissue paper using Liquitex Matte Medium. After it was dry, I added a light coat of white gesso over the canvas. Gesso works great as a primer for your surface. 
I let the canvas dry a few hours before painting. I used some of the Illustrated Faith Acrylic Paints and blended them together using a damp baby wipe.  

For some added texture I used Ranger's black archival ink and some Illustrated Faith stamps around the canvas.

Next I used Liquitex matte medium to glue down the tea cups, being sure to go over the top of the tea cups as well, with the matte medium to help secure them onto the canvas and seal them on. This will help later when I go around the tea cups with a Faber-Castell Big Pitt Brush marker for shadowing. Next I used some of the Illustrated Faith Home Spun Alpha's to read Psalm 23:5 being sure to go over them with the matte medium to help adhere them to the canvas. 

Once the canvas was dry, I went around the tea cups using the Faber Castell markers.  These are great for adding shading.  They are archival quality ink, but you have some time to blend them with your finger before it dries.  

Last I used a fine line sharpie pen to go around all the letters and the tea cups to help them to stand out on the canvas. 

This is such a great verse to help remind me of God's many blessings over my life. Thanks for checking out my canvas today! 

Blessings,
Krystal 


"Gypsy Heart" Mixed Media Canvas

Hello friends, and welcome! Today I want to share with you a little Mixed Media Canvas that I have just finished creating which I've decided to name "Gypsy Heart". 

gyp·sy
ˈjipsē/
a nomadic or free-spirited person. 

 Growing up as a child and into adulthood many times I remember being asked my nationality, and telling people that my family is Hungarian. I can recall many times when people would refer to me as being a gypsy because of my heritage. 
    
Supplies Used:
Bo Bunny craft decorative paper 2 pc (chevron and clocks)
Craft Smart acrylic paints (Robins Egg Blue, Light Pink)
Viva Inka Gold
Liquitex matte medium
White Gesso
Tim Holtz Distress Ink Pad (Vintage Photo)
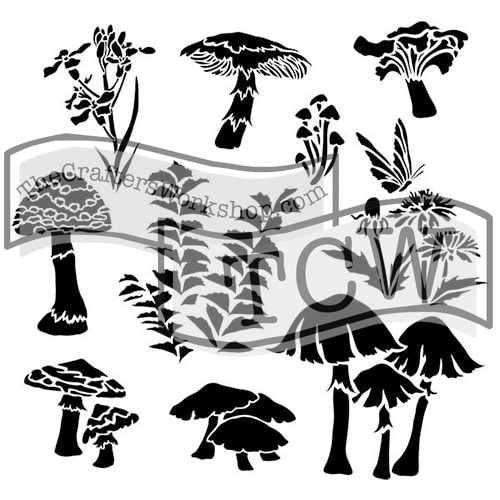
The Crafters Workshop Stencil - (TCW202s Mini Harlequin)
Michaels flower embellishment (dreamy)
Weldbond glue
Xyron Sticker Maker
metal frame embellishment
Faber-Castell Small Pitt Brush Pen Brown
Scissors/Craft Knife
baby wipes
small paint brush
cosmetic sponge

First I covered the canvas with a piece of Bo Bunnys craft paper by applying matte medium to the canvas with a brush and laying the paper on top of the canvas, then brushing a layer of matte medium over the paper to help seal it to the canvas.


Next I took some white gesso and a damp baby wipe to the canvas to give it a white washed look.  This will help the paints blend better on top of the canvas. 

The same way that I applied the gesso with a damp baby wipe, I also applied the paints with a damp baby wipe putting down color and then pulling up some of the color with the wipes until reaching the colors I wanted.

After getting the color down on the canvas, I used one of the Crafters workshop stencils along with some Viva Inka-Gold and a cosmetic sponge to add some pops of gold harlequin to the background.

I wanted some of the print in the BoBunny craft paper to show thorough in the background.

 I took a piece of lace and ran it through my Xyron Sticker maker to get some adhesive onto the back of the lace, and then stuck it onto the top of the canvas.

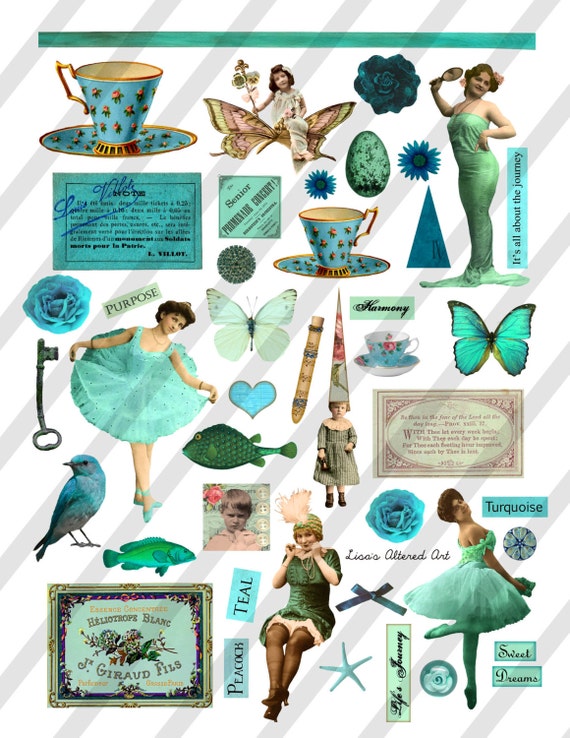
After printing out some digital collage pieces from Lisa's Altered Art Shop on Etsy. I cut a few of them out to use on this canvas.  I took the strip of pink and blue harlequin paper and glued it down onto the canvas along with the woman that I though could resemble a gypsy.  

On Lisa's Altered Art Shop I also found some phrase collage sheets, and when I seen the words "gypsy heart" I knew I wanted to use it on this canvas. I applied it right on top of the strip of paper I had glued down. After it was all dry I went around each of the collage pieces with a brown Faber-Castell pitt brush pen and blended it with my finger before the ink could dry. 

Next I took a metal frame embellishment and glued it down around the phrase on to the canvas with some weldbond glue.  I also used the same glue to adhere the flower to the left side of the canvas. 

Last I went around the canvas with some Distress ink to give it a worn look on  the edges.    
Thanks for stopping by and seeing how I created this quick little canvas with some really fun digital collage pieces that were printed and cut out.

I have included a link below so you can check out the Etsy Shop where I have found some of my collage pieces. 

 Enjoy this Fleetwood Mac video of one of my favorite songs. "Gypsy" 

Happy Crafting,
Krystal


Whimsical Mushroom Art Journal Page

Last week I finished up a canvas using The Crafter's Workshop "Whimsical Shrooms" stencil- TCW578 and I used modeling paste to give the mushrooms a raised textured look.  Today I was working in my art journal putting down layers of paint using various other stencils and when I was done I thought to myself what next?  I seen the "whimsical shroom" stencil sitting next to me and thought it would be fun to use it again in my art journal.  


First I grabbed 5 different Tim Holtz Distress Paints with Sponge Daubers on the ends. Next I got out  a variety of The Crafters Workshop Stencils.  I found it was so easy to apply paint with the stencil onto my page using the distress paints since they had a built in sponge on the bottle.  It was really effortless to apply. 


After I had three or four layers of paint on my page I used some Liquid Acrylic to add some purple to the areas where I still had white showing, bringing up some of the color with a baby wipe.  


For more texture I used a couple of Kaiser Kraft stamps along with some archival ink.  


 Next I got the "Whimsical Mushroom" stencil out and traced around the inside of the stencil with a graphite pencil.  Layering the mushrooms.


After I was finished tracing the mushrooms with a pencil, I colored in the mushrooms with a black fude ball pen.  


I then went around the mushrooms with a white paint pen, adding some spots and dots to the tops of the mushrooms.  I then watered down some white gesso and added some paint splatters to the page. 


I added a butterfly to the page putting some magenta acrylic on it for  a brighter color that would pop.  I then went around the butterfly with a black Derwent inktense pencil to add some shadowing.  


 I added a quote from the Tim Holtz small talk Sticker sheet, also going around the stickers with an inktense pencil like I did to the butterfly.


Thank you so much for visiting the Mixed Media Attic.  If you have any questions or comments I would love to hear from you.  

- Krystal Barto


Mixed Media Supply Shopping Haul

Today I wanted to share with you all my shopping haul from Tuesday Morning, Michael's, and Hobby Lobby.  I scored some really great deals, and used a few coupons. Check out my video below to see all the neat mixed media and art journaling supplies that I found. 


Thanks for visiting and checking out my latest haul!

Krystal Barto

"Whimsical Mushrooms" Mixed Media Canvas

Hello friends! Welcome to the Mixed Media Attic.  The last few days I have been working on a whimsical mushroom canvas.  Last month I picked up an adorable 12x12 Stencil from The Crafters Workshop called "Whimsical Shrooms" and since buying it I have had so many ideas going through my head on what I wanted to do with this stencil.  Finally after staring at it this whole time, I decided to create a fun little canvas to hang up in my art studio.  
Supplies Used:
12x12 The Crafters Workshop Stencil "Whimsical Shrooms"- TCW578
6x6 The Crafters Workshop Stencil "Mini Tiny Circles" - TCW361s
6x6 The Crafters Workshop Stencil "Mini Sheet Music" - TCW579s
6x6 The Crafters Workshop Stencil "Mini Believe Script" - TCW541s
Artist's Loft Super Value Canvas 8in. x 10in.
Hazel and Ruby Pass the tissue "Ephemera Collage"
Liquitex Light Modeling Paste
Weldabond glue
Ranger Glossy Accents
Liquitex Matte Medium
Ohto Fude Ball Pen 1.5 "Black"
Posca Paint Pen - "White"
Palette Knife
Paint brush
Makeup Sponges
Tim Holtz Stickers: "Small Talk"
Prima Marketing Resin Icons 
Prima Marketing Color Bloom Spray: "Gold Foil"
Liquitex Heavy Body Acrylic: "Bright Aqua Green" and "Medium Magenta"
Daler Rowney Liquid Acrylic: "Moon Violet, and Gold"
Tim Holtz Distress Paint: "Chipped Sapphire, Peacock Feathers, Mermaid Lagoon, and Cracked Pistachio"
Faber-Castell Gelatos: "Metalic Melon, Red Cherry, Lavender, Bubble Gum, Iced Chai, Gold Champagne, and Iced Coffee."


Steps:
1. Covered the canvas with a layer of Matte Medium, next laid down the tissue paper or collage paper, then added another layer of Matte Medium on top of the tissue paper to help seal it to the canvas.  Let dry
2.  Put down some Tim Holtz Distress Paints for the background. Let Dry.  Use some Liquitex Heavy Body acrylic paint and makeup sponges with The Crafter's Workshop stencils, to and layers to the background.  Let dry
3. Take The Crafters Workshop "Whimsical Shroom" Stencil, and wipe some modeling paste over the stencil to add some textured mushrooms to the canvas. Let dry.
4. Take some paints, and Faber-Castell gelatos to add bright color to the mushrooms.


5. Used some Spray ink to the resin fairy embellishments to add some gold sparkle, then glued them down to the canvas.
6.  Added some Ranger glossy accents to the butterfly, and parts of the mushroom for added shine.  
7. Used a Fude ball pen to go around the mushrooms to add some definition.  
8.  Added a Tim Holtz quote sticker to the canvas. Going around it in white.

9.  For detail I added some little white dots to the tops of the mushrooms. 
I have included a little video on the making of this whimsical mushroom canvas below. I hope you have enjoyed this and maybe some inspiration was sparked for you to create a fun canvas of your own.  Leave me a comment, I'd love to hear from you.  I hope you enjoy the process video!


Thanks for stopping by!

Krystal Barto


Altered 7 Gypsies Painter's Tray

Altered Turquoise Painter's Tray


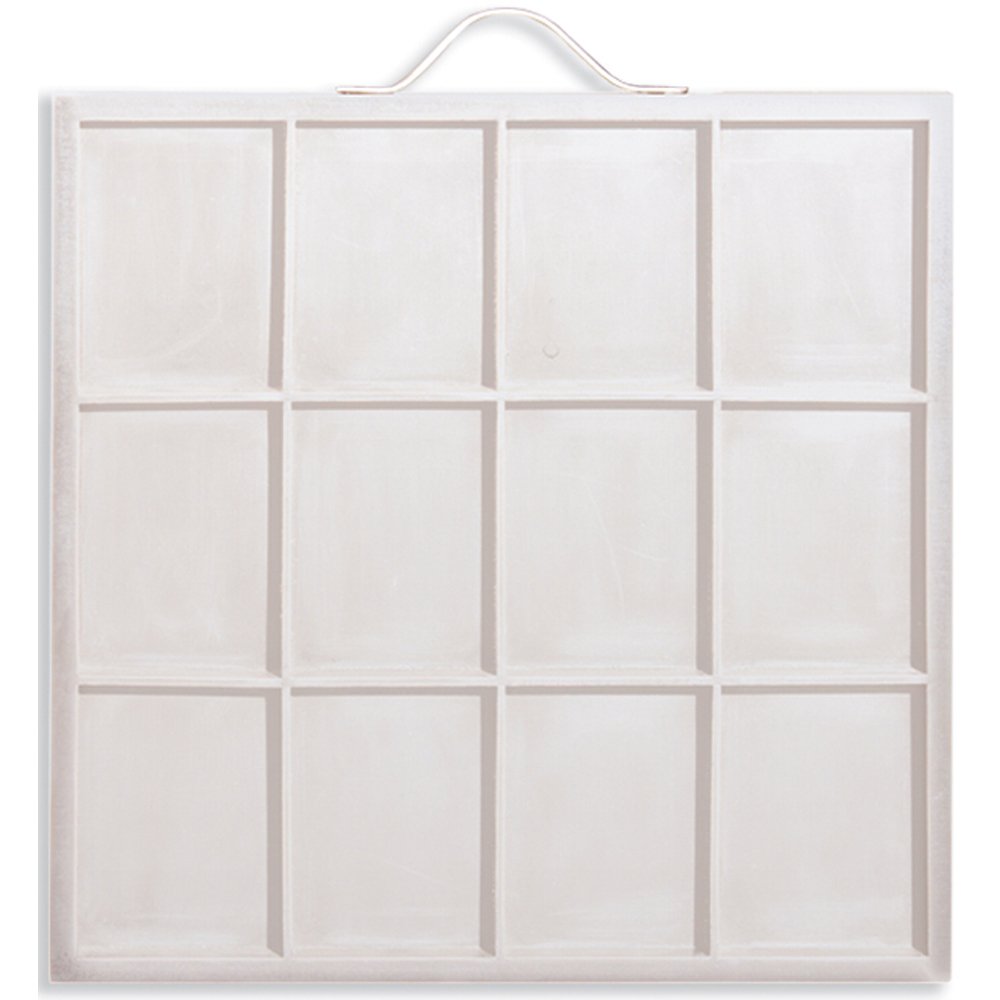
Hello friends and thank you for visiting the Mixed Media Attic today.  This week I have been working on an altered printers tray by 7 Gypsies. The possibilities of what you can do to a printers tray are endless.  There are so many great ideas for inspiration on Pinterest that you can find.  While shopping at my local Michael's store I was rummaging the clearance shelf one afternoon and found this Printers Tray nearly 50 % off the original price.  So of course I couldn't pass up the deal, and have been hoarding it in my stash for months. I can't help buying something when its on sale or clearance.  You can call me a craft hoarder I suppose, but I seem to always find good use for my discounted goods.  Can you tell that I'm tying to make excuses for my self now?

 
Recently while browsing Etsy.com (a website full of handmade, vintage, and other unique goods) for some vintage ephemera and embellishments I found this amazing Shop with the most unique vintage flapper girls.  Head over to Lisa's Altered Art Etsy Shop  to check out some of her digital files.  She also had some coupon codes up on her shop. I wanted to share them with you all. Seriously she has some neat stuff!   

COUPON CODES
Spend 10.00 and get 10% off. Use Code LAA10
Spend 20.00 and get 20% off. Use code LAA20

Here are one of the digital collage sheets that I  have purchased and decided to use.

Supplies Used:
7 Gypsies Printers Tray - White (12 1/8 x 12 1/8 x 5/8) 
Liquitex Matte Medium
Prima Marketing Shabby Chic Treasures Resin embellishments
Martha Stewart Wood Stain - Beach Glass
Tim Holtz Idea-olgy - Tissue Tape - Journeyman
DCWV Stack - Vintage Essentials 48 sheets
American Crafts Premium Ribbon Lace
Prima Marketing turquoise flowers
Metal and Wooden Embellishments 

Steps:
1. Cut out collage pieces, and cut out squares to fit in each square of the tray
2.  Lined the edges of each square with tissue tape or wahi tape
3.  Adhere the squares of paper with a matte medium
4. Paint the sides of the tray and edges of the squares
5.  Paint all the wooden embellishments
6.  Arrange each of the collage pieces and the embellishment, take a photo of how they are arranged so you remember how they originally were placed.
7.  Glue everything down.

With that I called it finished.


Be sure check out Lisa's Altered Art Esty Shop for some unique finds to add to your latest projects and art. Thanks for stopping by and checking out my blog post today.  I would love to see what kind of altered art you all will come up with.  Leave me a comment.  

  Below I have included a YouTube video for you all so you can watch me create this altered printers tray.  Enjoy!


 Happy Crafting Friends!


November Art Journal Pages - Documented Life Project 2015


The year is quickly coming to an end and here I'am playing catch up with the Documented Life Project 2015. It seems every year around the holidays, our normal routines in life kind of get brushed to the side to prepare for the holidays.  I want to be able to say I finished my DLP this year.  It is now the third week into December and I'm just now starting on this months challenges.  I keep telling myself "I can do it".  Is anyone else finding themselves playing catch up too?  I wanted to share with you some of my pages  from November since I've been seriously slacking on blogging my pages with you. Enjoy!

November Theme
Stencils, Stamps, and Masks
November 7
Art Challenge: Stencils - Made or Bought
Journal Prompt:  On the edge of uncertainty…what are you afraid of?


November Theme
Stencils, Stamps, and Masks
November 14
Art Challenge: Use a Hand Carved Stamp
Journal Prompt:  Tapestries


I just love this quote by Maya Angelou.  It was quite fitting for the challenge.


November Theme
Stencils, Stamps, and Masks
November 21
Art Challenge: Use a Mask
Journal Prompt:  "Mask"arade


What seems ordinary is often the extraordinary.


November Theme
Stencils, Stamps, and Masks
November 28
Art Challenge: Combine the Three (Stencils, Stamps, and Masks)
Journal Prompt:  "Three things in human life are important. The first is to be kind. The second is to be kind. And the third is to be kind."-Henry James


Be kind always to others and most importantly to yourself. 

Practicing my faces...

Thank you all for stopping by and checking out my November challenges for The Documented Life Project 2015!  

You had me at hello...

October Theme
Translucent Papers
October 3
Art Challenge: Deli Paper
Journal Prompt:  You Had Me At Hello

Fall is in the air... For most of us it is, anyway.  Here in Southern California it looks and feels like summer still.  Since moving here from Ohio, I've longed for the beautiful fall days where the leaves are changing colors, the air is cool and crisp, and I can wear scarves, boots, and sweaters, and go to a pumpkin patch. October has always been one of my favorite months, with it being the month where it starts to really look and feel like fall. I felt inspired to incorporate a fall theme for this weeks challenge.


Steps :
1.  Cut out the leaves and pumpkins using my Silhouette electronic cutting machine.  
2. Put down deli paper covering both pages, sealed with a matte medium.
3. Painted the pumpkins and stems.
4.  Colored the background with Faber-Castell Gelatos
5.  Used a stamp with brown ink to add texture to the background.
6.  Adhered the pumpkins to the page, then the leaves around the border of the page, then adhered the gold foil chipboard work "hello" and die cut "October".  
7.  Out lined and added shadow around everything.  
8.  Added gold shimmer mist splashes in the background.
And with that I'm calling this one done.  


.Happy Fall Y'all!
Krystal