January Planner Set Up // The Planner Society Kit

Hey Planner girls, I hope you all had a great Christmas! The new year is quickly approaching, which means resolutions and goal setting for many of us.  This months The Planner Society Kit has a goal theme to it so I thought it would be fun to set up my A5 Kikki K planner with this months kit and use it as a goal planner and tracker.  Plan with me video at the end! 


I stuffed the front pockets full with all the goodies that came in this months kit, and adding a few sticker sheets from past kits. 


I added a little washi card that I made using all the washi from the two kits and wrapping it around a piece of the floral card stock packaging.


I loved all the inspirational quote cards.  The one that I wanted to use front and center for me to see every time I open my planner says "A goal with out a plan is just a wish."  If that isn't some motivation to read every time you open up your goal planner then I don't know what is!


How cute are the little planner girls holding the big bouquet of flowers?


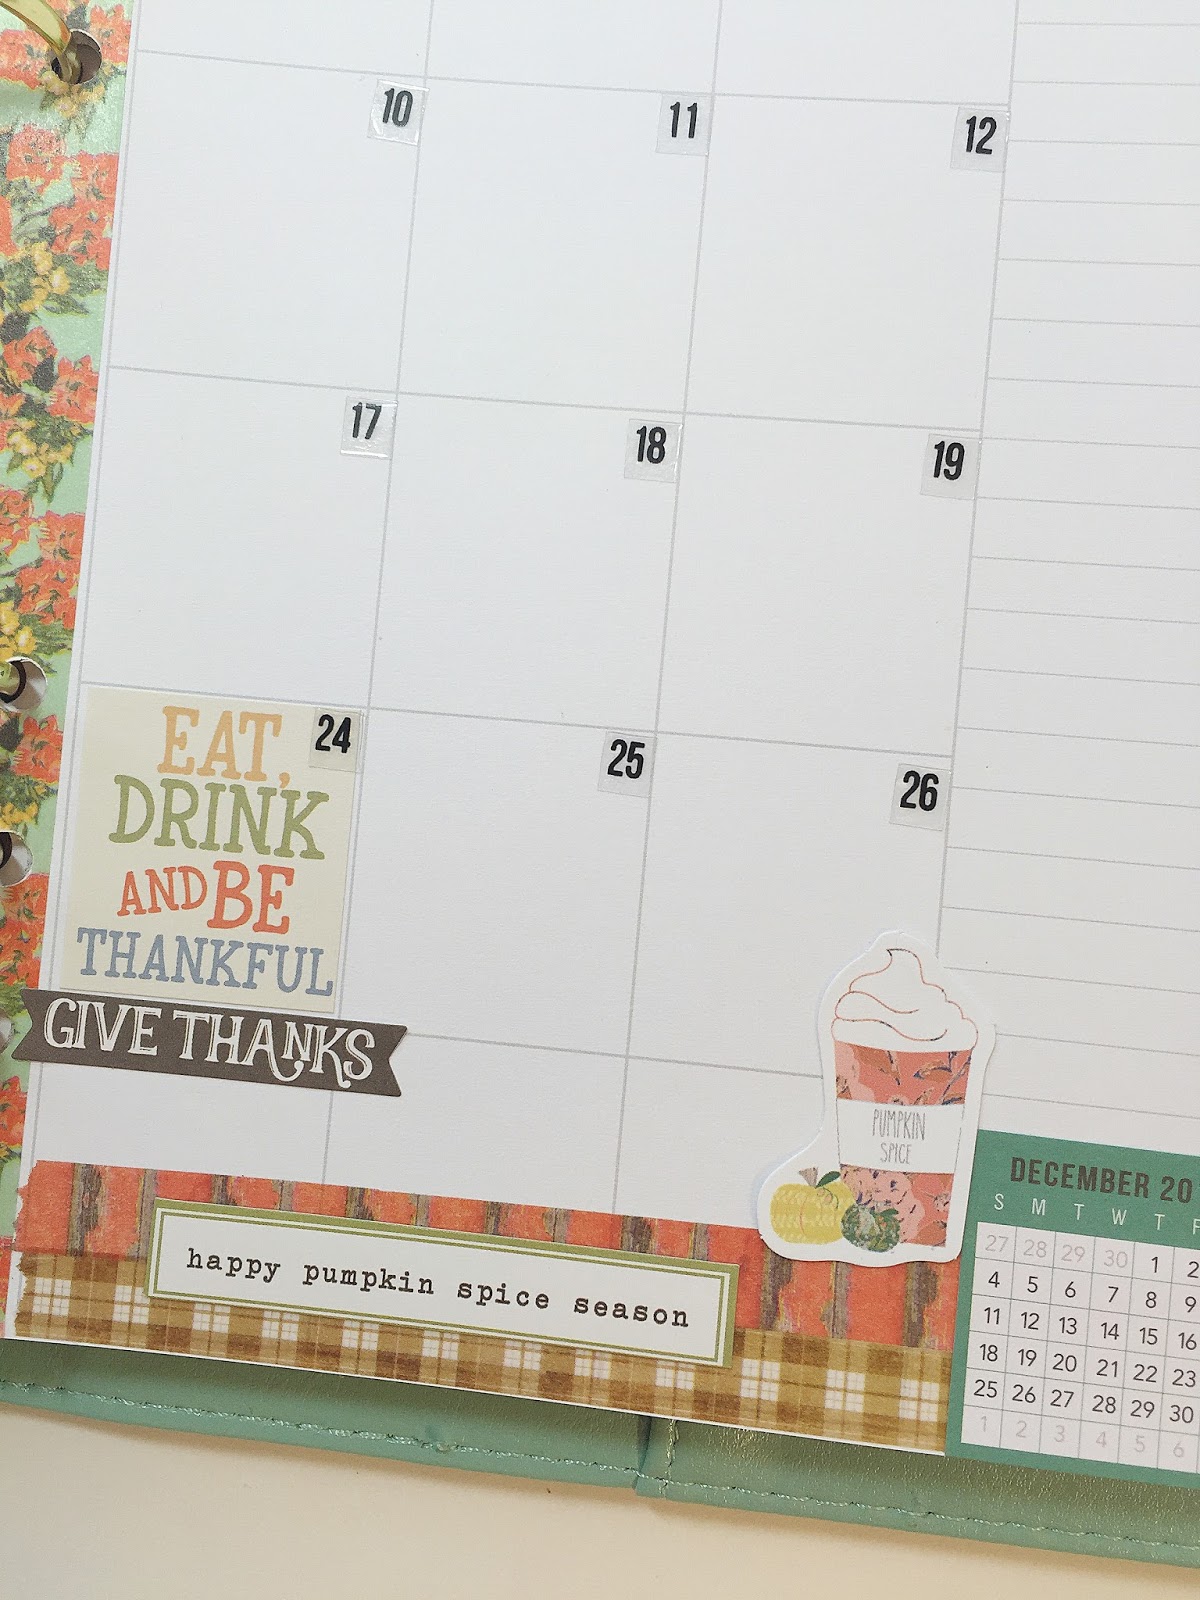
I kept my monthly spread pretty simple just adding some washi around the edges and some of the stickers. 


I pulled out a note yellow floral note pad from a previous kit that happened to match with the yellow floral in this months kit.


I added a tab to the top, hole punches on the sides and ran it through the laminator.  I want to use this as a book mark for the day and thought it would be fun to stick my sticky notes to it since it is laminated.   


Another fun inspirational quote to "Do what you love and love what you do."


There is the gorgeous matching yellow floral I was talking about. 


I laminated all of my dividers.  Here on the back side of one of my dividers I added another sheet of that sticky note, another great place to stick my sticky notes or use as a dry erase. 


I made one more book mark for my notes adding a sticky note here so again I could use it to lay my sticky notes on top since its laminated or as a dry erase board.  

I have done an unboxing and planner set up video for you to check out to see more.


Happy Planning!
Krystal

The Planner Society December Planner set up/ Plan With Me


I wanted to do a planner flip through of my December set up in my Carpe Diem Ballerina A5 Planner using the November Planner Society Kit, and there is a little weekly plan with me at the end.  Enjoy Planner Girls!

Merry Christmas Friends!
Krystal


The Planner Society Kit Planner Setup / Plan With Me Video


Hey planner girls!! I wanted to share with you my planner set up in my Carpe Diem Posh planner using October's Scarlet Lime The Planner Society Kit.  I also have a plan with me video at the end of this post for you to watch as well.  


The front pockets of my planner are stuffed full with a washi card I made using this months washi kit, along with stickers and a cute to do note pad.


Here in the front of my planner is the dashboard I made using some of the packaging from the puffy stickers that said "happy planning".  After cutting it down I layered some of the papers in the kit behind it, and added a die cut fox and puffy sticker quote.  


I also made five different dividers for my planner using the papers from the kit along with the tabs and tab stickers.  


The first divider is for monthly calendars.  Since the planner society kits ship late in the month, I used the October kit to set up for the month of  November.  


I love that this months kit has a fall feel to it.  My Simple Stories Hello Fall Collection matches with it perfectly.  


How pretty is this denim floral pattern, and the little owl?!


I used the journaling cards included in the kit on each of the dividers and layered some papers and washi behind them.  


The pen from this month matches my planner perfectly, and that floral.  I have all the heart eyes for!  I love how every thing always coordinates and matches so well within the kits each month. 


Here is the plan with me video to see how I made these dividers, the dashboard, washi card and the monthly set up.  Thanks for stopping by.  If you would like more information on the monthly subscription kit to the Scarlet Lime Planner Society you can here :  http://www.scarletlime.com/plannersociety15.html

Happy Planning!
Krystal

Unboxing The October Planner Society Kit


Hello planner girls!  I just wanted to do a quick post for the unboxing video of Scarlet Lime's October The Planner Society Kit.  


Thanks for watching! If you have any questions, or want to leave me a comment. I love chatting with you gals! Check back for my planner set up, and plan with me video using this kit.   

Happy Planning!
Krystal

PLAN WITH ME: CARPE DIEM THE RESET GIRL PLANNER SET UP


Hello planner friends, and welcome to the Mixed Media Attic! Today I wanted to share with you all a few things that I did to set up my Carpe Diem The Reset Girl A5 Ballerina Planner by Simple Stories. I have also filmed a plan with me video which you can watch down below. 


I went ahead and used the dashboard that came in the front of the planner.  I think that Honey Girl is just so confident and the way her arms are up in the air make it seem as if she is saying "Bring it on world, I got this!"  I added some washi tape and die-cuts to jazz the page up a bit, along with page reinforcements around the ring holes.


The back side of the dashboard had a little library tag with little strips of wash.  I thought it would be neat if I laminated my dashboard so I could use the back side to attach sticky notes pads on the library tag like I did here above.  


Above is one of the dashboards that comes in the dashboard set, I added some diecuts from The Reset Girl Big Pieces and laminated it also, so that the sticky notes could be attached to it. 


Here was the first half of the weeks layout using The Reset Girl Carpe Diem Planner Basics stickers.


And here is the second half of the weekly layout. 


Finally the full weekly layout!  If you would like more details on how I made my dashboards and the dashboard for the sticky notes, or to see the walk through of my planner set up, and the weekly plan with me then please be sure to watch my video below.   


Thanks for popping in today!
Happy Planning.

xoxo
Krystal

PLAN WITH ME: ERIN CONDREN LIFE PLANNER / HALLOWEEN


HI friends! Today I'm doing a spooky little plan with me video, in my Erin Condren Life Planner.  Since we are approaching the middle of October I thought I would do a fun Halloween theme for this week.  


I used some Recollections washi tape from Michael's stores, and some cute planner stickers from my favorite Etsy Shop: HelloHappinessCo , and some other stickers I came across last year *for personal use only*


I had this little skeleton die cut hoarded in my stash, and I figured he matched so well with the washi tape so, I glued him down there. 


I started to fill out the first part of my week, and Wednesday I'll sit down and plan out the other half of the week in more detail. If you would like to see the process of me putting this week together, or want to see more details of the products I used then watch my plan with me video.  You can check it out right below. 


Thanks for visiting!

xoxo
Krystal

New Webster's Pages Color Crush A5 Floral Planner Kit


Welcome to the Mixed Media Attic! Today I wanted to share with you all my new Webster's Pages Color Crush A5 Navy Floral Planner Kit, Exclusive at JoAnn Stores.  At the end of September JoAnn's had sent me a birthday coupon for 20% off my entire purchase *including sale items.  Well when I went into the store to do a little birthday shopping for myself, all of their paper crafting supplies were 50% off so when I seen the planner and our eyes met, I knew it was going home with me! This planner ended up being 70% off after using my coupon!! Below I have a link to the video of the planner walk through so you can see what the inside of it looks like. 


I've also done a little plan with me video for you to check out, of me making some dashboards and dividers for this planner that I want to use for my blog planning. 


I really like that these planners have the photo pocket in the front along with two side pockets as well.  Now all I need to do is fill this baby up with lots of cute planner goodies. 


For the dividers I used some left over tab stickers that came in my monthly The Planner Society Kit. I also used some left over cards and washi tape from September's kit to make the dashboard below.


I tried to pull together lots of minty green and light pinks to coordinate with the planner.  I had some scraps from the Maggie Holmes Gather collection which were used for the next two dashboards. 


I also wanted to pull some pieces from the Carpe Diem Posh and The reset girl die cuts since the colors meshed so well together. 


Again I used some pieces from Carpe Diem The reset girl, and stickers from The Planner society. 


If you liked my dividers and dashboards and would like to see more on how I made these watch my plan with me video down here below:


Thanks for stopping by, leave me a comment I'd love to hear from you!

xoxo
Krystal


Carpe Diem Posh Planner haul and un-boxing video

My planner is finally here that I pre-ordered back in May (four months ago)! So I'm sure you can imagine my excitement for it to arrive just the other day! I wanted to do an un-boxing video for you all of the new Carpe Diem Posh Boxed Planner Set in "Robins Egg", and a haul of all the planner goodies that I got. Check out the video below or click here to view it.


 I also did an un-boxing video of the Carpe Diem The Reset Girl Planner in "Ballerina", which you can check out here. Thanks for stopping by and happy planning!
xo Krystal


Carpe Diem The Reset Girl Planner un-boxing and haul video


She is finally here!! Yes My Carpe Diem Boxed Planner Set is finally here! I ordered the Ballerina planner back in May and it was on back order.  Well today it has arrived and I just had to do a little un-boxing video for you all! 


Happy Planning!
Krystal

Overflowing Blessings Canvas


Hello, and welcome to the Mixed Media Attic! I wanted to share with you all a little canvas that I just finished working on this afternoon.  The verse Psalm 23:5 says "My cup overflows with blessings."  

                                                                                                                                    I had an idea to take that verse and use it on a canvas with some stacked tea cups.  I decided to use some card stock paper from the Illustrated Faith collection "She Blooms".  I used my Silhouette Portrait Die Cutting Electronic cutting machine, to cut out the tea cups. I stacked the tea cups on the canvas before starting, just to make sure there were enough for the height of the canvas. I like to take pictures of the way things are arranged, so when they get moved later I will remember the order that they were in by looking at the picture taken. After making sure there were enough tea cups to stack, I covered the canvas in some printed tissue paper using Liquitex Matte Medium. After it was dry, I added a light coat of white gesso over the canvas. Gesso works great as a primer for your surface. 
I let the canvas dry a few hours before painting. I used some of the Illustrated Faith Acrylic Paints and blended them together using a damp baby wipe.  

For some added texture I used Ranger's black archival ink and some Illustrated Faith stamps around the canvas.

Next I used Liquitex matte medium to glue down the tea cups, being sure to go over the top of the tea cups as well, with the matte medium to help secure them onto the canvas and seal them on. This will help later when I go around the tea cups with a Faber-Castell Big Pitt Brush marker for shadowing. Next I used some of the Illustrated Faith Home Spun Alpha's to read Psalm 23:5 being sure to go over them with the matte medium to help adhere them to the canvas. 

Once the canvas was dry, I went around the tea cups using the Faber Castell markers.  These are great for adding shading.  They are archival quality ink, but you have some time to blend them with your finger before it dries.  

Last I used a fine line sharpie pen to go around all the letters and the tea cups to help them to stand out on the canvas. 

This is such a great verse to help remind me of God's many blessings over my life. Thanks for checking out my canvas today! 

Blessings,
Krystal 


Packed and ready for Revival Camp!

Hello friends!  Happy first day of summer to you!  I'm not sure what part of the world you are reading this from but here in Southern California we kicked off summer with a heat advisory and Temperatures hitting the 120's today... Yuck! This summer I will be joining the Illustrated Faith community and attending their summer Revival Camp. I was asked by a relative where it was at and how long.  I giggled a bit to my self, and replied with a smile "It is online and in my craft room for the next 12 weeks."  

More Information about camp can be found here:

The Workshop comes with lots of printables, and a packing list.  How cute? I like that the packing list included a color pallet of the colors that are in the printables.  It made it so easy to pull pieces from my stash, from other things I  had already on hand.  I love that one of the printables was an insert to make your own travelers note book for "field notes" and, three different covers for your notebooks with the Revival Camp Logo on them. 

I made two travelers sized notebooks with the printables included with the workshop.  The first one I used the field notes printable and printed about 6 pages front and back, next I cut down the paper to size 8.5x8.5 , followed by printing and cutting down the cover on a sheet of white cardstock (for added weight). I put the cover on top of the field note sheets and made sure every thing was even and straight to be folded in half long ways. Last I opened up the folded paper and took a long arm stapler and stapled 2 staples one at the top center and one at the bottom center of the pages.  I took some washi tape and applied it along the spines of the note books the cover the staples and add some layers to it.

I did the same thing to make my second travelers sized notebook, except for taking blank copy paper and cutting it down to size and using a different color for the cover. The purpose for the blank pages in this notebook are for me to be able to add the weekly devotional and printable embellishments to the pages along with some journaling. This summer during my hike with God through this journey I want to also do some bible journaling that corresponds to the weeks scripture.  Week one spoke from the book of Nehemiah, and about what ignites our passions.  

So Here I sit packed and ready for revival camp. Ready to soak in the teachings from this workshop and dig deeper into his word all while creating and crafting to glorify His great name! I hope you will all join me around the camp fire this summer along with the Illustrated Faith community!  

Blessings Friends,
Krystal